This tutorial provides an overview of adding text to your document. See Adding Text for more information.
- Open Pics Print, or create a new document.
- Change layout to 'Quarter Page'. To do this, from the 'Page Layout' menu select 'Automatic Layout' and then 'Quarter Page'.
- Add an image. The document should look like this:

- Add a text box. To do this, choose 'Add Text Box' from the insert menu. A large white text box will appear, The document should now look like this:
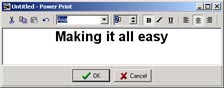
- Double click in the text box. This will open the text
editor. Enter some text and press OK.
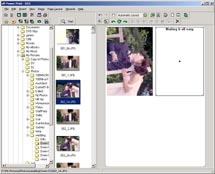
- Your document should now look like this:
- This is a stand-alone text box and it can be treated just like an image. It can be moved and resized in exactly the same way.
- Select the image. From the 'Items' menu, choose the 'Attach text' command. This will create a text box and attach it to the image. As this is an attached text box, it is treated as part of the image and will be moved and resized along with the image. By default, an attached text box contains the image's filename.
- Resize the attached text box by selecting it, and then dragging the bottom middle resizing handle downward. This will resize the text box. Since it is attached to the image, and it is an automatic layout, the image will also resize.
- Select the image (or the attached text box, it doesn't matter) and select 'Edit Text' from the 'Items' menu. The text editor will open. Close the text editor and double click on the attached text. The text editor will reopen. Change the text and close the editor.
- Reorder the document by selecting the image and dragging it down to the bottom of the page. The page will rearrange but the text box will still be attached to the image.
- Select the image and remove it. The attached item will also be removed.